What We’ve Been Making This Winter (Craft and Recipe Links!)
Happy Monday, Friends!
I thought I’d share some of the crafty fun we’ve been up to here over the past few weeks (actually months, considering the green grass showing in the picture above!). And a few tasty recipes we’ve enjoyed (at the bottom).
Here are some awesome links we’ve enjoyed. (Thank you to those of you who passed these on to me!) Also, I’ve included instructions to make a paper garland to hang in your windows (or where ever!)
Crafts for Kids and Moms too!
Mess-Free Finger Painting (The Hippie Housewife)…I LOOOVE this! We’ve had it taped to our table all weekend!
Homemade Finger Paint (Easie Peasie)… These go great with the previous link!
Cloud Shapes in a Baggie (Once Upon a Grain of Sand) Oh the joys of water, oil and food coloring!
Bird Nest Necklace (Sarah Ortega) So beautiful and simple. I think it’s so precious 🙂 I haven’t made one yet, but I hope to! Thanks, Carissa, for posting this on your blog. And I love the ones you made too!
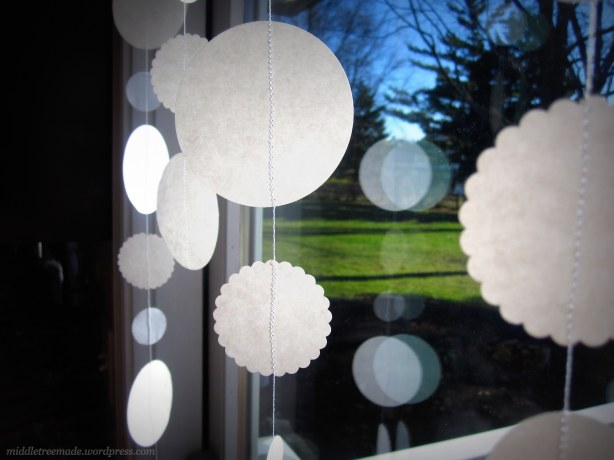
Paper Garlands for your windows! (Pictured above)
Kids can help punch shapes, color the shapes, or draw pictures on them. And maybe if they’re old enough, they could help with the sewing too!
Ok…so I know there are millions of other people that have made these, but this is how I did it. You can also use felt … that would be a bit more durable probably. But can you cut through felt with those craft punches? I’ve never tried! Anyways…here’s how I did my paper garland.
Materials:
- Paper/cardstock
- Craft Punch, different shapes and sizes if available
- Sewing Machine
- Thread
1. Punch out lots and lots of shapes out of your paper/card stock!
2. Bring your shapes to your sewing machine. Pick some thread you want to use. Make sure your machine is threaded and ready to go!
3. Before sewing, leave a long “tail” of thread (that way, later, you can tie it to something or tape it up somewhere depending on where you decide to hang your garland)
4. After pulling out some thread for the “tail”, start sewing your paper punches. Yep, just take one piece/shape, and push it through your machine as you slowly press the peddle.
5. After each shape, I just kept “sewing” with my foot on the peddle, just to leave a little space between shapes. I would make sure to gently pull each shape out after I finished sewing it, to make sure nothing got tangled. Then I continued to add the next randomly chosen paper shape until it reached the length I wanted. Or if you want, you can skip making the space, and just sew then right next to each other.
6 Cut thread when finished, make more if desired, and hang up some pretty, crafty, paper garlands around the house!
What we’ve been eating lately!
Chilaquiles for a Crowd (Rick Bayless)…Yum. We didn’t really make this for a crowd, tho, so we cut down the recipe a bit. I served it with some chopped lettuce. And leftovers are great too…I like to add some fresh chips with the leftovers, along with more lettuce and sour cream. That was you can scoop it and eat them like nachos. Also, for the salsa, we used Frontera Chipotle Salsa.
Simple, Wholesome Granola (Food.com) I love this stuff. I also added 1/4 c. of wheat germ. Big brother really loved “helping” mommy make this. By helping I mean eating it, of course. 🙂
Fruit Bottomed Yogurt (Simple Bites) This is delicious, and how great is it to have breakfast ready in the fridge so that you don’t have to make it in the morning!? Love this. It really helps a lot, since we are often starting the day at 5:30 a.m. (Yes, that is early. Hence the reason we are party-poopers, and head to bed around 9 p.m. 😉
Well…time to get a few other things done while the boys sleep. Maybe brush my teeth? I know. Seriously. Are we still friends?

HA! Oh, we are definitely still friends. My teeth and hair are both unbrushed… and I still wearing pajama pants. NOW are we still friends? 😉
I have been wanting so badly to make our own yogurt and granola! We eat it every morning anyway… might as well make it ourselves and save some pennies. I admire you for doing it even with two littles!
(P.S. thanks for the link share 🙂
Where were you with all your ideas 20-30 yrs ago when I needed them? Seriously, I hope alot of young moms will enjoy being creative with them…..thanks for sharing…..
Love,
Polly